![]() High-resolution industrial CT for NEV battery cell performance and safety
High-resolution industrial CT for NEV battery cell performance and safety
Industrial computed tomography (CT) is defined by its ability to swiftly perform very detailed non-destructive component scans. This makes it essential for new energy vehicle (NEV) applications, where optimum vehicle performance is powered by large and dense battery cells. Quality assurance must be performed on these cells in atline production settings and quality labs alike to detect faults, tackle issues such as aging, and optimize designs.
Overhang measurement for accurate cell assembly
Proper positional alignment of the cathode and anode is key to the assembly quality of lithium-ion cells. Overhang is the distance between endpoints of anode and cathode. This is a critical quality index for cells and modules, as oversized anodes cause capacity problems and undersized anodes lead to issues with aging. The performance and safety of pouch cells may also be affected by stack alignment, which refers to the alignment angle of each individual electrode layer. While 2D X-ray technology is incapable of reliably measuring overhang due to the lack of 3D information, industrial CT can do so in a single scan. Its ability to detect overhang in two different directions also enables easy calculation of stack alignment in pouch cells.
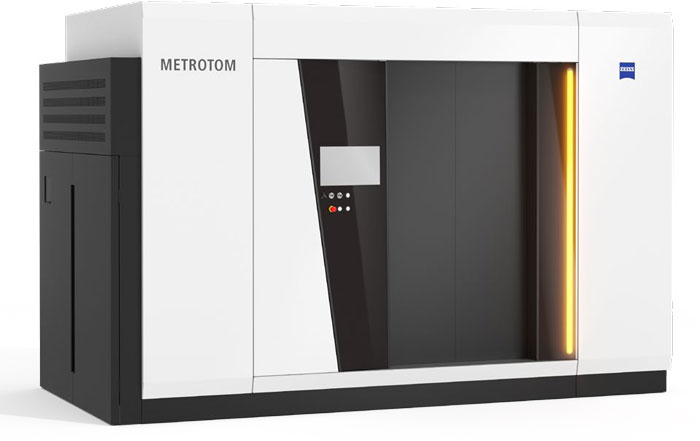
ZEISS METROTOM 1500 delivers highresolution scans with good contrast, meaning that it can generate clear images of large and dense modules. With users demanding excellent accuracy and reliability in 24/7 operation under tough conditions, it can evaluate overhang in atline environments for immediate feedback.
It is also suitable for failure analysis on defective samples in QA labs, generating results that further optimize the production process. ZEISS has even developed its own integrated CT evaluation software that can be customized to perform the measurement task automatically – whatever the setting.
Foil-to-tab weld is now a critical quality challenge
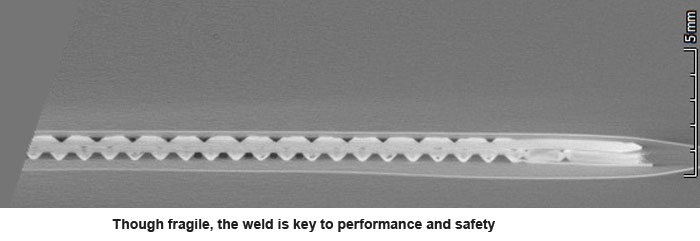
As a key aspect of the cell assembly process, the foil-to-tab weld gathers all the current collectors and joins them to a tab that exits the cell. Typically implemented via laser or ultrasonic welding, it enables the transfer of cell energy to any external source and the use of increasingly thin foils has lent it critical importance. Given that there may be up to 50 layers in a cell and the fragile tab welding itself measures only 8 μm, users must turn to non-destructive industrial CT in order to evaluate the strength of the intact welding
Thanks to its high-resolution inspection capacity, ZEISS METROTOM 1500 identifies tab and busbar welding defects in a single atline scan with a small voxel size. It is also used to perform failure analysis on rejected samples in the QA lab and can help with improving future operations. This is crucial for safeguarding performance and safety, as welding issues on the busbar in a module would lead to certain electrical or mechanical properties failing to meet the necessary requirements.

Wide-ranging defect detection with industrial CT
Electrode defects within the housing, including gaps, bending, cracks, voids, and folded foils, can also cause serious performance and safety issues further downstream. And as the gassing effect means that electrode gaps may expand after conditioning (the initial charge and discharge cycle), electrode defect inspections must be performed both post-assembly and post-conditioning. Industrial CT is the only technology capable of performing sufficient non-destructive scans after the conditioning stage – and its high speed is particularly beneficial in this context. The non-destructive method is additionally important during failure analysis because it leaves the failed samples intact.
Cell contamination represents another major safety issue and must be avoided in the finished product. There is a significant chance of contamination occurring during cell assembly, with metal particles potentially entering the cell at various intervals such as the welding process. Industrial CT makes it easy to perform non-destructive inspection on the finished product, with the high resolution performance of ZEISS METROTOM 1500 delivering fast and comprehensive results. This ensures reliable detection of metal particle contamination and prevents any subsequent negative impact on the cell and module assembly.
The larger size and complex structure of modules makes measurement more challenging and necessitates additional QA tasks. The most important of these is the inspection of the electronic components that govern the performance and stability of the finished product. If a module should fail, the connection of these electronic components is typically first to undergo non-destructive inspection. Powerful industrial CT generates clear scans of electronic components, examining details like the wire layout of a PCB and the bending of pins in a connector. The high resolution, good contrast, and small voxel size of ZEISS METROTOM 1500 form a particularly effective solution in this setting.

Industrial CT is vital for NEV cell quality
Within the workflow from cell material processing to cell production, industrial CT is used at the cell and module assembly stage.
ZEISS METROTOM 1500 is ideal for measuring a wide range of battery cells, as its scan speed and resolution can be adapted to suit the demands posed by different sizes and densities. Its large measurement volume easily accommodates multiple components or whole modules for greater speed and efficiency.
Non-destructive measurement with industrial CT identifies hidden inconsistencies and faults, making it essential for ensuring the safety and performance of battery cells and modules. It handles dense components and detailed inspections that are beyond the scope of alternative solutions such as 2D X-ray. By leaving failed samples intact, industrial CT promotes process optimization through failure analysis in the Quality Assurance lab.

Facts and figures
ZEISS METROTOM 1500

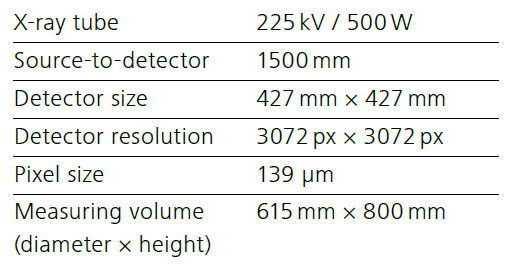
ZEISS METROTOM 1500 is a one-stop industrial CT solution for all cell types. Its ability to handle parts up to 1500 mm in height and 50 kg in weight is ideal for inspecting entire multi-cell modules, which face similar issues but on a larger scale than individual cells. ZEISS METROTOM 1500 can be customized for faster measurement or more high-resolution output where required. By safely identifying quality defects in the cell and module assembly, industrial CT avoids reliability issues further downstream and saves costs.


 High-resolution industrial CT for NEV battery cell performance and safety