Sensors for automotive production
In fully automated processing, a large number of sensors is required for monitoring and control tasks. Due to the increasing requirements for process stability, production reliability and quality, ever increasing precision and data rates are necessary. In terms of Industry 4.0, sensors from Micro-Epsilon ensure that data is acquired in real-time and can be used for the respective application. From the pressing plant to assembly and quality assurance, sensors are used in process control, monitoring of supplier parts and in final inspection, while optimizing the production process.
Monitoring metal sheet infeed during the pressing process
A core process of automotive production is the manufacturing of frame, chassis and car body parts in the pressing plant.
A tool punch presses the plate to be formed into the mold (die). The flange of the sheet is partially pulled inwards because the thickness of the component decreases as a result of the deep-drawing process while the displaced material flows from the edge of the sheet. This distortion can be detected as a change in distance. This value is crucial for the quality assessment of the pressed part and for controlling the tool punch.
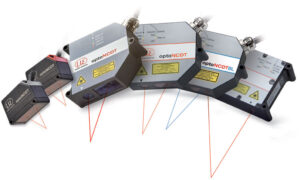
The measurement of the distortion is carried out using several optoNCDT 1420 laser triangulation sensors, which are placed around the metal sheet, either in the tool or on the side of the tool. Due to their extremely compact design, these laser sensors can be effortlessly integrated into restricted environments. The arrangement is chosen in such a way that the laser beam measures on the edges of the sheet, which is between the top and bottom of the tool. Due to the extremely small measurement spot size, the sensor is able to measure extremely tight gaps between the two tool parts.
The measured values are transmitted via analog or digital outputs to the controller. They allow a conclusion to be drawn on how much material has flowed which enables to control the pressing force during the process.
Marriage of engine and car body

optoNCDT laser displacement sensors, for example, monitor the “marriage” of the car body and the engine. Car body and engine, i.e. the entire drive train, are joined together in so-called marriage lines. Therefore, the drive train is moved into the production line on a frame. At this point, the car body is suspended from a device and is swiveled from above by a robot in such a way that the car body is above the drive train, which is then lowered onto it. Laser displacement sensors mounted on the device measure the distance between the car body and the engine. Via the distances values, the robot receives the exact position of the engine. This is how the car body must be placed exactly onto the drive train and fastened accordingly. Due to their large measuring ranges and their insensitivity to different reflections, optoNCDT laser sensors are particularly suited to this measurement task. Another advantage is that the sensors are equipped with an integrated controller. This makes the installation of an external controller superfluous and simplifies mechanical integration and wiring considerably.
Highly accurate cockpit positioning
Another robot-based assembly step is the cockpit installation in the car. The car cockpit includes hundreds of individual parts and weighs up to 100kg. Its installation requires extremely precise positioning work. Therefore, a rectangular frame of metal struts with two grippers is mounted on the outsides on a robot arm. The gripper grabs the cockpit on both sides and moves it horizontally in the direction of the vehicle, which is fed into the assembly line on a conveyor belt. Shortly before reaching the vehicle, the robot inclines the cockpit side to be mounted slightly downwards. In this position, the cockpit is swiveled into the passenger compartment over the robot through the opening, which is intended for the driver door and then turned horizontally again.To monitor the position, four optoNCDT laser sensors are used which are installed in the four corners of the metal frame respectively.
The sensors measure reference points in the vehicle interior. These can be prominences and depressions. These four sensors ensure that the cockpit is properly aligned in the x-, y- and z-axes. When all sensors have detected their respective reference marks, the robot is stopped in order to move the cockpit forward into exactly this position relative to the car body, to dock it on and to fix it in place. For the entire process including the fitting of the cockpit, an extremely short cycle time of less than one minute is required. The sensors must operate independently of the surfaces, as different reflections occur due to the multitude of different surface paints used – from dark to bright colors and from mat to shiny surfaces. Therefore, the laser sensors must be able to control the intensity and the reflections in real-time to ensure reliable positioning processes.

Car windows
In the automotive industry, there are measurement tasks which require simultaneous detection of several measurement values or three-dimensional detection of measurement objects within short cycle times. For example, when installing the windshield, a scanCONTROL laser line sensor detects detailed distance values in all axes. In the installation process, the sensor is mounted onto the robot, which fits the window into the vehicle. When the windshield is placed on the car, the scanner detects the complete profile and vicinity of the windshield while all necessary values are determined with a single run in quick time. It can be determined whether the windshield is placed straight and centered or whether it fits perfectly in every plane. The results, which are in this case the gap and flushness, are directly generated in the sensor and output to the PLC.
Another measurement task concerns the adhesive, which is already applied before the windshield is fitted into the chassis and also detected by a laser scanner. Therefore, the scanner is directly mounted onto the robot that applies the adhesive beading. Here, the sensor moves along the adhesive bead to create a 3D image. It reveals whether the adhesive quantity is constant, whether it is applied evenly and whether the bead is applied in the correct places. All detected measurement values are stored separately. If an error occurs in the process at a later point in time, these measurement values can be used for analysis purposes.
Gap inspection
When assembling a vehicle, numerous gap and flushness measurements are necessary. This includes, among other things, the position inspection of airbag stitching. The scanner detects the contour of the stitching while being guided by a robot arm and evaluates several features synchronously. The laser scanner continuously inspects the distance between the stitching and the separating point between the single stitches and outputs the evaluation directly as 0 (NOK) or 1 (OK) via the Ethernet interface. Beyond that, the height difference between two single components is directly inspected in order to immediately recognize any faulty assemblies that might impair the safety.
Another measurement task involves gap monitoring in car interiors. Important parameters of quality are homogeneous gap sizes of cockpit elements and the center console. Depending on the inspection situation, a single scanner applied on a robot arm can measure different gaps in a static or dynamic mode; alternatively, a special frame on the robot arm is used that enables the scanner to detect a number of different gaps in the interior in static mode within fractions of a second. The sensor evaluates these measurement values and sends a signal to the control system if the values measured lie within the tolerances defined by the customer. Other gap inspections also concern the car body, e.g. when measuring gaps in doors or when assembling body trims.
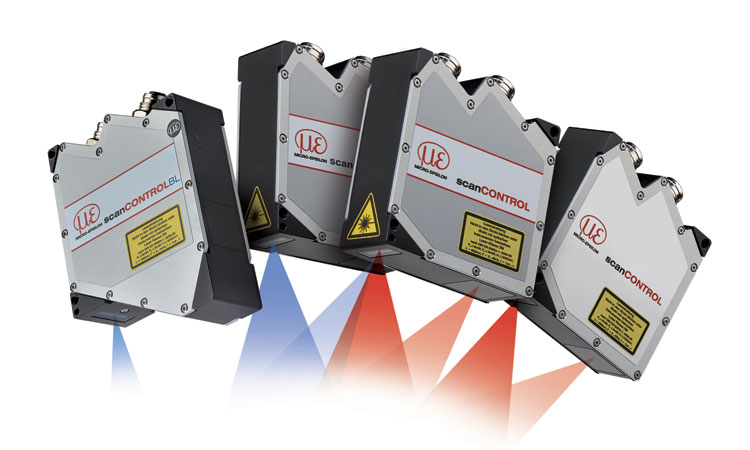
The strength of scanCONTROL laser scanners, also called laser profile sensors, is their compact design, which allows for the sensors to be integrated also in restricted installation spaces. The entire electronics is housed in the sensor, i.e. no external controller is required. Robot-suitable cables enable extreme twists and torsion movements on the robot. In addition, laser scanners from Micro-Epsilon have a sensitive receiving matrix with high resolution that enables measurements on almost all industrial materials, largely independent of the surface reflection. Laser scanners detect up to 2048 points on a laser liner. Via a relative movement from the sensors to the measured object, also three-dimensional captures with high resolution can be generated.
Micro-Epsilon offers laser scanners with either red or blue laser diode, which is usually only used when the red laser light is operating at its limits, e.g. with organic materials, wood, semi-transparent materials or red-hot glowing metals. The blue laser light can be more sharply focused on certain surfaces where it provides high precision measurement results.


